Right then, you've nursed your wort through fermentation, and now it's time for the final act – bottling. Whether you're crafting a proper English bitter or experimenting with something more adventurous, getting your bottling technique sorted makes all the difference between a decent pint and something truly special.
Let's walk through everything you need to know about bottling, from choosing your vessels to achieving that perfect level of condition.
Selecting the Right Bottles for Your Brew
Plastic Bottles: The Economical Starting Point - Those plastic fizzy drink bottles you've been collecting? They're actually quite suitable for your first bottling attempts. They're designed for carbonated drinks, labels come off easily enough, and they won't cost you a penny. The main drawback is light exposure – clear plastic offers no protection against UV rays that can create unpleasant off-flavours in hoppy beers.
Recycling Commercial Beer Bottles - Collecting empties from your local? Excellent choice, particularly if you can get brown glass bottles. They provide far better protection against light strike than clear ones, which is crucial for maintaining your beer's quality over time.
Do check each bottle carefully for chips or hairline cracks – damaged glass and pressure don't mix well. Some brewery labels come off easily with warm soapy water, whilst others seem permanently bonded. A bit of soaking usually does the trick.
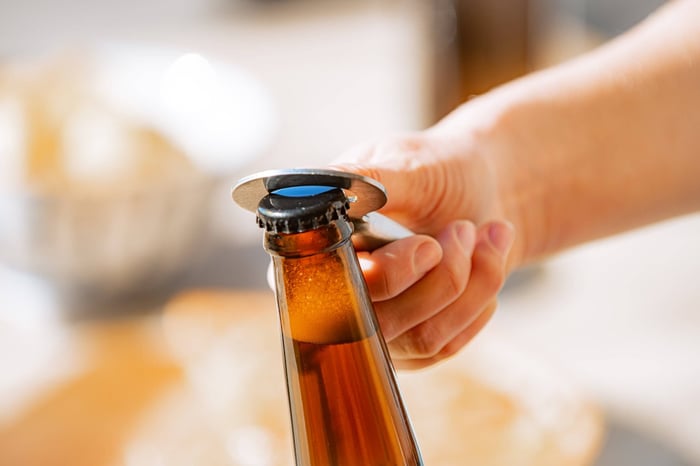
Purchasing New Bottles - When you're ready to invest properly, your homebrew shop offers several options. Crown-cap bottles give you that authentic pub look and allow you to colour-code different batches with various cap colours. Swing-top bottles are remarkably convenient – no need to buy caps repeatedly.
Here's a useful tip: PET bottles offer a practical advantage for monitoring carbonation. When first filled and capped, you can squeeze them easily. Once conditioning is complete, they become quite firm – it's like having a built-in carbonation gauge.
The Art of Bottle Conditioning
Bottle conditioning is essentially giving your yeast one final task. You're creating a controlled environment where remaining yeast can produce just enough CO₂ to properly carbonate your beer.
Carbonation Drops: Simple and Reliable - This method is wonderfully straightforward. Fill your bottles straight from the fermenter, pop in one carbonation drop per 500ml bottle, cap up, and Bob's your uncle. It's consistent and removes the guesswork – particularly handy when you're bottling several different styles.
Priming Sugar: Precision Conditioning - For complete control over carbonation levels, calculating your own priming sugar is the way forward. Different beer styles traditionally have different conditioning levels:
- English Bitters: 1.5-2.0 volumes CO₂
- Milds and Porters: 1.7-2.3 volumes CO₂
- Best Bitters: 2.0-2.5 volumes CO₂
- Wheat Beers: 2.5-3.5 volumes CO₂
Creating Your Priming Solution - Dissolve your calculated sugar amount in roughly 475ml (16 fl oz) of boiling water – this sterilises everything whilst creating your solution. Allow it to cool to room temperature before use.
You can either add this to a separate bottling bucket and rack your beer on top, or add it directly to your fermenter with careful stirring.
Professional Bottling Techniques
Sanitation: Non-Negotiable - Everything that touches your beer must be spotlessly clean and properly sanitised. This includes bottles, caps, siphoning equipment, and any vessels you're using. British homebrewers have access to excellent no-rinse sanitisers that make this process efficient.
Develop a systematic routine:
- Rinse bottles immediately after drinking
- Clean thoroughly before bottling day
- Sanitise everything just before use
- Keep clean equipment covered
Ensuring Fermentation is Complete - Never bottle beer that's still fermenting actively. Your hydrometer readings should be stable for at least 48 hours. This patience prevents over-carbonation that could lead to bottle explosions – definitely not something you want in your kitchen cupboard.
The Dishwasher Sanitising Trick - Your dishwasher makes an excellent bottle sanitiser. Run it empty with detergent to clean it thoroughly, then load your bottles and run a hot cycle without any cleaning products. The sustained heat effectively sanitises your bottles whilst saving considerable time.
Dealing with Problem Bottles - Occasionally a bottle will over-carbonate and foam everywhere when opened. Check another bottle before assuming it's a batch-wide issue – usually it's just one or two bottles with contamination problems.
If several bottles show over-carbonation, don't chuck them immediately. Set them aside for extended aging. Sometimes wild fermentation develops fascinating flavour complexity that improves remarkably over six months or more.
British Seasonal Considerations
Our changeable weather affects conditioning times significantly. Summer temperatures speed up the process, whilst winter conditions slow everything down considerably. Generally, allow 2-3 weeks at fermentation temperature before transferring to cooler storage.
You can tell when conditioning is complete in glass bottles by checking for sediment formation at the bottom. With PET bottles, that firmness test we mentioned provides immediate feedback about progress.
Wrapping Up Your Bottling Success
Bottling might seem like just another chore, but it's actually the final creative step in your brewing process. Whether you're producing traditional British styles or developing your own signature recipes, proper technique ensures all your hard work shines through in every glass.
The fundamentals remain constant: maintain absolute cleanliness, confirm fermentation is complete, and allow proper conditioning time. Your patience during this final stage pays dividends in quality and drinkability.
Ready to expand your brewing knowledge? Check out our complete Brewing 101 series with techniques specifically relevant to British homebrewers.
Got questions about your bottling setup? Drop us a line – we're always chuffed to help fellow brewers perfect their technique.
Cheers to your brewing success,
Grainfather Team


